
I was looking for a Han Solo mould, for resin crafting. I'd seen them at collector fairs, etc, and they were always sold out of the smaller size (though if anyone wants to pay me to make a cake-pan-sized Han Solo in carbonate for an iPad cover or something...I'm there). So I found one on eBay instead. Looked the same (ironically, the listing proudly proclaimed "Please inspect pictures carefully"), and a quick search on Amazon revealed the exact same image but with more expensive postage, so eBay won out.
 |
| Screen grab from the listing (seller ID covered, to be fair he had very little negative feedback and this could have been a one-off iffy listing). |
What arrived was NOT the item in the image I had so carefully inspected at the seller's request, which was blatantly a stock image poached from the internet. I will not use the word "fake" because frankly I don't know where I stand legally doing that. But see for yourself below and make your own decision.
The mould was so thin in places that light shone through it. The "carbonite" area of the mould was practically smooth, compared to the highly textured example in the photograph. The face looked like a smooth, almost featureless "Scream" mask. The hands were just ridiculous.
The mould was so thin in places that light shone through it. The "carbonite" area of the mould was practically smooth, compared to the highly textured example in the photograph. The face looked like a smooth, almost featureless "Scream" mask. The hands were just ridiculous.
Immediately I emailed the seller to complain and request a refund. I pointed out that I had, in fact, studied the image very carefully (unlike whoever made the mould), and had been sent a different, much lower-quality, item. I also pointed out the lack of definition on the clothes and carbonite, the lack of facial features, the oddly-shaped "shoe spaces" that look nothing like the image, the Muppet hands and the fact that certain areas let light through. I was thorough.
 |
| Spot the difference between the Amazon listing image and the one used on the listing I purchased. Besides the eBay listing having their ID Photoshopped across the bottom of the image... |
In fairness I did get a reply within a couple of hours, and of course my returns request was accepted. But not before it was pointed out to me (and I quote) "Just checked my picture with my mould and i honestly don't see any difference whatsoever." As if I was just being overly pedantic by calling them out on their shoddy item. If you click the stock images above to get the full-size version, just compare it to the lower items in the pairs below, and feel good that you are better at spotting differences than that guy.
So, I thought I would do a quick comparison. To the one I bought (bottom), and the real one I replaced the initial purchase with (top) which came from Great Gear Store via eBay (the above image with the ice cube also features in their listing photograph as well, so I am going to presume that it is the same item as also featured on Amazon, and supposedly the item in the original listing). All of the detail photographs are of the inside of the moulds. The lighting makes some of the top pics look "inside out", but it's just me trying to get the hang of my new lights!
Packaging
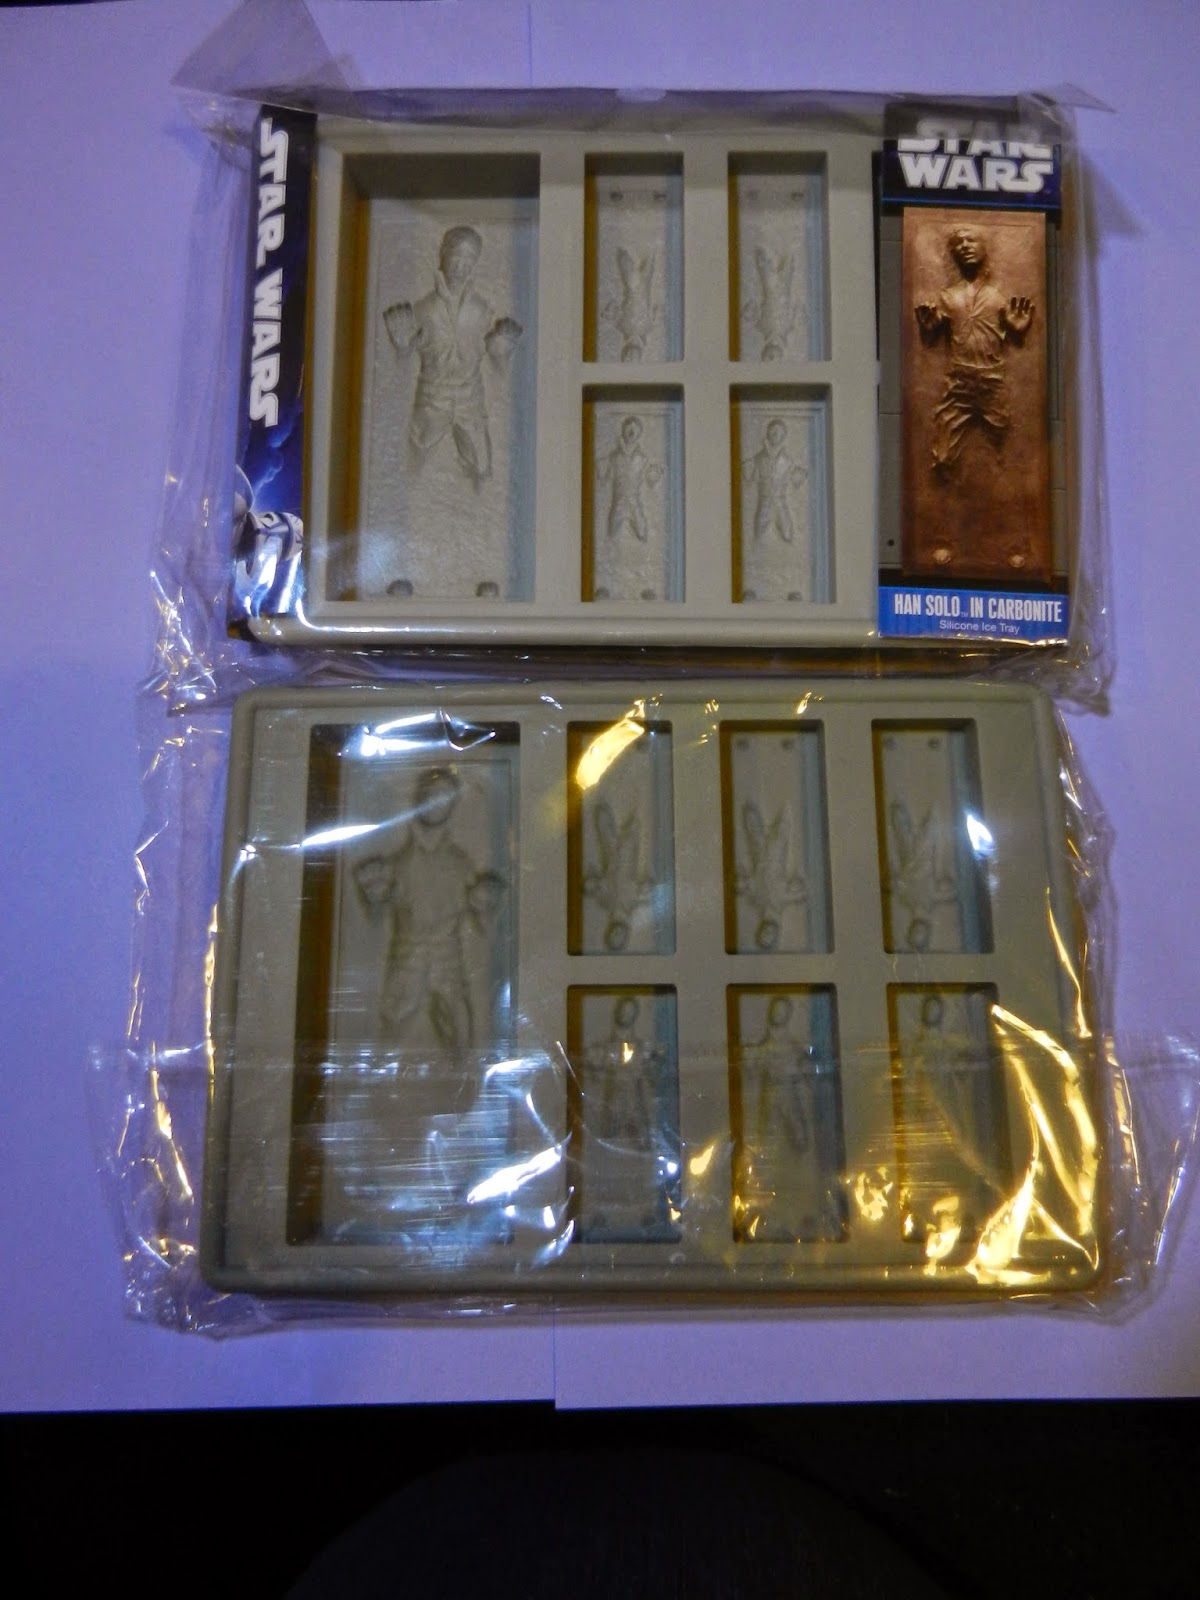
So, I thought I would do a quick comparison. To the one I bought (bottom), and the real one I replaced the initial purchase with (top) which came from Great Gear Store via eBay (the above image with the ice cube also features in their listing photograph as well, so I am going to presume that it is the same item as also featured on Amazon, and supposedly the item in the original listing). All of the detail photographs are of the inside of the moulds. The lighting makes some of the top pics look "inside out", but it's just me trying to get the hang of my new lights!
Packaging
You can't tell from that picture, but the top packaging also has a hanging strip to display in store. The bottom one does not.
Face


No contest really, is it? But supposedly, the bottom one is no less detailed than the top one.
10/10 for a blind guy managing to use eBay though...That would explain not noticing that the bottom Han Solo has NO EYES.
Hands
A friend and I decided that the closest description we could find to the hands from the original mould was "Muppet Fingers". Now, I know Disney own both Star Wars and The Muppets, but really, this is not a cross-over I wanted.


A friend and I decided that the closest description we could find to the hands from the original mould was "Muppet Fingers". Now, I know Disney own both Star Wars and The Muppets, but really, this is not a cross-over I wanted.
Are you a maaaaaaaan...Or are you a Muppet? Going on those bottom hands, Muppet! So undefined.
You can also see how abysmal/absent the texture is on the clothing.
Shoes

Replacement (L) vs Original (R). you can see how crisp the edges are on the replacement.
Carbonite Texture


Again, supposedly this was exactly the same as the one pictured...
"Edging"


It looks like the bottom picture is blurry. I've come to the conclusion that is because the whole mould appears to have been made in soft focus. You can see that the top has double lines, whereas the bottom just has a rough single edge. Also in the top image, Han looks like Voldemort. I assure you he DOES have a nose. It's just the angle.
Small Moulds
Yup. No difference at all... </sarcasm>
Quality
Obviously I wouldn't use the mould that I wanted to return, but the quality difference is visible. Especially when held up to the light...
I'm willing to bet it wouldn't take too many uses/cleanings before that super-thin facial area split.
I cannot recommend the awesome The Great Gear Store highly enough, the item arrived the next day so my error didn't cost me anything time-wise, it was well packaged, and obviously as you can see is the real genuine article. I've since looked at their website, which is bound to cost me a fortune in the future as I seem to need pretty much everything they sell. Great gear, great service.
Thanks Great Gear Store! :)


